This is the first time I have ever used Aftereffects, so I am a complete beginner in using the software. Here is the documentation of the first session, where we learn the basics of the program. We will use Aftereffects throughout the module, so it should prove to be a very useful session.
---
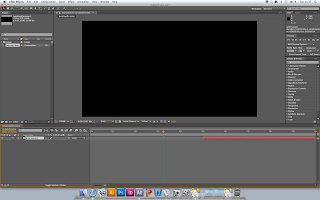
The whole interface is locked in, unlike Photoshop where there are floating windows. If the interface gets too complex or not relevant to another project, the 'Reset "Standard"' option will revert back to the default interface.
Window > Workspace > Reset "Standard"
---
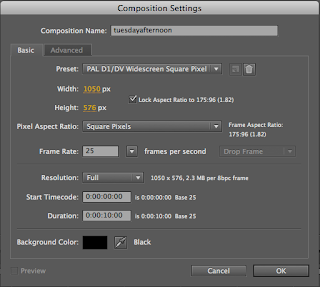
Composition > New Composition ⌘N
Composition > Composition Settings Command ⌘K
(This is for altering the document after creation)
PAL DV/D1 Widescreen Square Pixel is the format we'll be working in.
NOTE: PAL is a regional format, that works at 25fps. NTSC works at 29.97, and is widely used in American countries.
(An option to alter background colour)
0:00:00:00 - Hours, Minutes, Seconds and Frames
Zoom In to Composition ⌘ +
Zoom Out of Composition ⌘ -
-or-
Use the scroll wheel.
With the timeline, the grey bar at the top can be reduced by dragging. This will zoom in or out of the timeline.
The 'Tilde' key, in between ⇧ and 'z' on the keyboard, will maximise the selected window.
---
Unless it's a very simple project, layers will be used within the document. A layer can only contain one thing at a time. There are many different layers but this is the type we're using in this demonstration; solid.
Layer > New > Solid ⌘Y
Anything underlined indicates it can be altered. Clicking this opens up the cursor to manually enter measurements.
The Current Frame Indicator is the red line on the timeline to indicate where the animation is at that current point. Scrubbing is dragging the Current Frame Indicator across the timeline to check if it will play back okay. Previewing the animation is possible using space bar, but it's only effective with simple animations.
RAM Previewing is using the preview menu to play back the timeline. It buffers complex images to play back more smoothly.
---
A quick animation based on traffic lights, the progression is demonstrated through the Current Frame Indicator below the preview window.
---
The right-facing triangle on the layers list is a drop down list. This brings up transform, which will bring up a list of variables to alter the shape.
Tweening transforms the shape from one frame to the other in a smooth manner. Eg. A square to a circle over 25 frames will slowly get rounder frame after frame until it gets to the perfect circle on frame 25.
A keyframe is a moment in time that saves the state the object was in. For example, a square may be 100 x 100 pixels one frame, then 200x200 50 frames later, saved with the keyframe. Tweening transforms the shape from one state to the other in a smooth manner. Eg. A square to a circle over 25 frames will slowly get rounder frame after frame until it gets to the perfect circle on frame 25.
To add a keyframe, click the stopwatch to the side of each variable. It will remember the current information, and comes up with a yellow diamond. The left and right options either side of the diamond in the layer section will cycle through the keyframes on that layer.
To copy a keyframe, highlight them by dragging, then Copy ⌘C and Paste ⌘V into the required layer. This is useful when syncing up different layers.
To make a whole sequence quicker, highlight the times in the keyframes, then alt + drag them to make the whole sequence shorter.
The grey bar directly above the timeline can be dragged to shorten the render time, and only play back a certain amount, known as a work area. This is useful when you have a long timeline, but you are only altering a small part of it. It can also be rendered in a work area if only a small amount is necessary in a final piece.
---
Selecting Items:
⇧ - Selects a range.
⌘ - Selects individual.
⌘A - Selects all.
Specific Keyframe Keyboard Shortcuts:
P - Position
A - Anchorpoint
R - Rotate
S - Scale
T - Opacity
This is useful when numerous layers are in use, opening the full transform list can clutter the interface and confuse things. Having all the layers selected will make keyframe and effect adjustments to all layers.
I - To the inpoint of the layer.
O - To the outpoint to the layer.
B - Select beginning of work area.
N - Select end of work area.
U - Show all animation properties.
Double tap U - Show all modified properties.
You can alter position with the Besier curve. To get rid of a Besier curve, choose the 'Convert Vortex' option in the pen tool menu.
---
Composition > Add To Render Queue
Change from 'Animation' to H.264. Best quality for a smooth play speed. Output to User Work.
Reason for Render Queue, is to maximise workflow by leaving jobs overnight in industry.
---


