Tuesday 24 January 2012

Aftereffects: Session 5

New techniques to be learnt today:
Additional Keyframes
Simplifying composition
Grouping
Adding sound
Pressing 'U' opens all animated properties of the composition.  At the moment, all squares move across the screen from left to right at a constant.  To apply acceleration and deceleration, the keyframes have to be eased in and out.

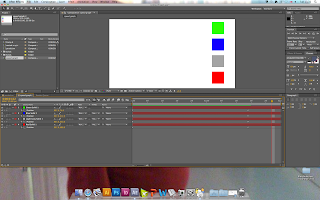
To do this, go to Animation > Keyframe Assistant, and select either ease in for acceleration, and out for deceleration.  If the object has to be eased in and out, the 'easy ease' option will apply both.  Below is a demonstration; the green square is eased out, blue eased in and the grey eased in and out.  The red stays at a constant speed for comparison purposes:


---

THE GRAPH EDITOR

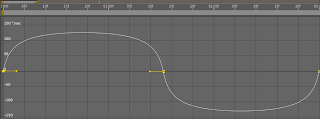
On the toolbar at the top of the layers menu, there is a 'Graph Editor'.  This demonstrates acceleration and deceleration in more depth, and allows custom changes to be made:

 (constant speed)

 (acceleration)

(constant speed) 


---

SWINGING THE PENDULUM

Using the ease in and ease out technique, we had an exercise to emulate a swinging pendulum.  We brought the black layer into the composition, and doble clicked the eclipse tool to add a mask to the solid.  By pressing 'Y' it is possible to adjust the anchor point, ready for rotation.

By adding three keyframes, rotated -80, 80 then -80 again it will rotate the shape around the anchor point at a constant speed.  Going to the graph editor and selecting the speed graph will allow the customisation of the ease in and out technique.  Once tweaked, there is a shape that will accelerate to 0 degrees, and decelerate on 80 and -80.  Demonstration below:


---

ESTABLISHING PARENT CHILD RELATIONSHIPS

When there is a parent child relationship, the child can move individually, but it is always bound to the parent layer.  All properties apart from the opacity layer.

When creating a path for the layer, 'Auto-Orient' allows the object to move with the curves.  The 'rove over time' option disregards that keyframe in the timing, making it easier to create flowing movement.


---


---

Another way to group objects together is to make a whole composition, simplifying the timeline of the key project.  Layer > Pre-compose does this.


---

.aiff or .wav are the best audio files to use within AfterEffects.  MP3s can be exported in Quicktime 7.


When exporting to .mov in AfterEffects, make sure the 'Audio Output' box is ticked.

Tuesday 17 January 2012

Aftereffects: Session 4

We're going to be looking purely at text, and what we can do with it, created directly within Aftereffects.

The anchor point is originally placed at the bottom left of the text.  It can be altered under the transform menu or by simply pressing 'Y' on the keyboard to change the position with the mouse.

The source text changes the format & copy within the text over time.  When making a keyframe, the keyframe is square.  This means that this is a hold keyframe that doesn't change form smoothly over time, just over the changes of keyframe.


---


When we animate the text, expanding range selector gives the start point, end point and more advanced options.
By adjusting the start and the end point, the animation slowly moves each letter from the original point to the finalised position.
The offset just moves the start and end points throughout the length of the type,  so it can create a wave effect when dealing with position for example.

But then there's some advanced options...

Unit: Can change from percentage to index, which sets the units to an absolute number of characters.  This is incredibly useful when selecting a specific point.
Based On: Can animate characters, characters without spacing, whole words or lines.
Mode: Adjustments to how the animation moves.
Amount: Think of it as opacity for animation: how much it shows.
Shape:  Choose a shape in which an animation will form to.
Ease High & Low:  Not looked at yet, but to do with keyframe interpolation, acceleration and deceleration.
Smoothness: 0% provides no movement from other characters.
Randomise Order:  Puts the sequence in an unpredictable pattern.


---

On 'Animator 1' you can add other variables such as tracking or colour.  The options remain pretty much the same, here are examples of experimenting with this:


---

A path can also be created for the text to follow, by using the pen tool when the layer is selected.  By adjusting the first and second margin, movement on the line can be created with the use of keyframes, demonstrated below:


Monday 16 January 2012

Displaying Information: Initial Ideas


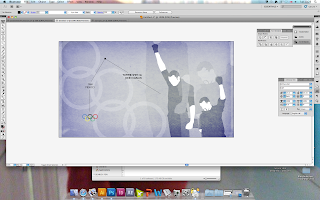
Experimenting with different textures and compositions with a different image, and looking into how to display facts & figures within a piece of motion - using the kinetic line idea in my initial storyboards to guide the eye.


---

Start to look into the identity of the BBC, heavy use of Gill Sans and the colour red.  They also incorporate circles into their idents, which fits perfectly into the theme of the Olympic Rings.