InDesign has less original swatch colours than Photoshop or Illustrator. Applying colour to a shape is as simple as selecting it and choosing a swatch. When working with text, clicking the 'T' icon in the swatches palette will apply any of the swatches to the text, instead of the backdrop.
A quick way to create a swatch is to click the New Swatch option on the drop down menu and adding the CMYK value.
To add a tint, selecting an existing swatch and selecting New Tint from the drop down menu will allow different percentages of that swatch to be made.
When importing a file from Photoshop it is important to consider:
- CMYK/Greyscale
- 300 dpi
- Making sure it's the actual size.
- Format - TIFF or PSD? Baring in mind PSD can apply transparency.
After placing the 'Lake_Duotone' file into InDesign, the swatches 'Yellow C' and '273 C' are in the swatch palette ready to be used in the document. This applies to any artwork placed into InDesign of a PSD format.
---
When importing a file from Illustrator it is important to consider:
- Colour mode should be in CMYK.
- Format should be a AI file.
The considerations from an Illustrator point of view is less because it works in vector form.
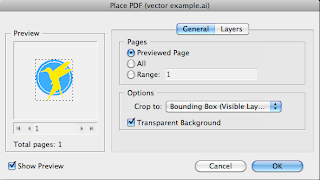
When working with AI files, the placed image will have its transparency maintained. An advantage of the quick preview is that InDesign will run much faster whilst giving you a general idea of what the document will look like. Also, because it is linked, any changes to the file itself will automatically update. To do this in a quick and easy way, Alt + Double Click the InDesign preview which will open the file in Illustrator. Making any changes, saving and closing will update the preview in the InDesign document.
---
Note that the file will open in the default program that it is set to. For example, TIFF files could be set to open in 'Preview', whereas it would be more useful opening in Photoshop. To change, 'Get Info' on the file and set the 'Open With' section from Preview, to Photoshop.
Working with TIFF in greyscale allows a monotone colour to be applied to the piece. By selecting the image rather than the frame, by clicking on the circle icon within the image, a swatch can be chosen to apply a monotone - in this case 2718 C.
---
Separations Preview double checks the prints by previewing each colour individually as negatives.
The process colours knock out each other to prevent any unwanted mixture, demonstrated below. The Magenta knocks out the Cyan to determine the two separate colours. By going to the Attributes menu, overprinting a colour will not knock out the colour which will lead to an overlap of colour. The red in the Ink Limit view highlights areas where too much ink is applied.
To apply a varnish effect, using a spot colour that hasn't been used anywhere else in the design can be used for this purpose. To prevent a knock out effect, selecting the Overprint option in the Attributes menu will stop the varnish being printed on an unprinted backdrop.
Window > Output > Separations Preview
Window > Output > Attributes


No comments:
Post a Comment